


Which Green Screen Software is Best for Photographers
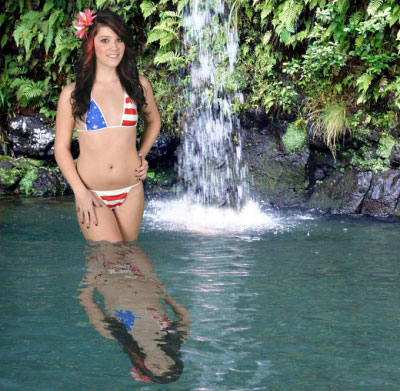
The Layering & Reflection Special Effect available now with Green Screen Wizard PRO 9.0 represents the state-of-the-art in chroma key post production.
These days the professional photographer who is looking for the best chroma key software has a number of choices. So let’s take a look at the green screen software features most important to those who make their living producing stunning images for their clients — and which software delivers best on what photographers need to expand their businesses…
Professional photographers demand state-of-the-art when it comes to technology, especially software – and there are significant differences between the green screen software available today.
Of course the most critical feature for any green screen removal process is the algorithm used to separate your subject from the background down its finest component – a human hair! Each software product on the market uses its own proprietary algorithm to accomplish this process.
In addition to that, since no one has yet created the absolutely perfect algorithm, the software also needs to have the ability to make critical adjustments easily and accurately to allow the professional to create a truly realistic and desirable image for the client.
With the recent release of Green Screen Wizard Pro Version 9.0 for both Windows and MAC, this is one powerful tool for the demanding professional. Its Reality Integration™ proprietary algorithm is way ahead of the competition in its ability to zero-in on background areas and remove them from your green screen image. The original algorithm was first released in 2007 and has been refined and made more powerful and accurate five times since then. This is why Green Screen Wizard Pro outshines the others with its highly advanced removal process.
Fully-Integrated Airbrush Editor Brings Out the Finest Hair
 Green Screen Wizard Pro’s Airbrush Editor puts 15 amazing brushes at your fingertips – each designed to enhance and make more realistic the removal and restoration process, as well as simple ways to expertly embellish your images.
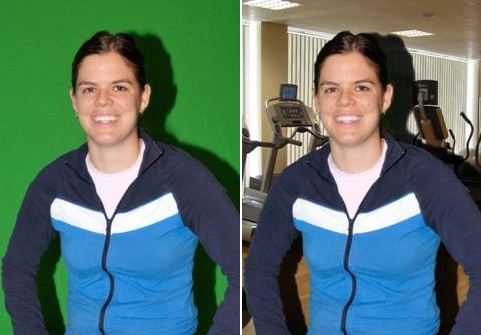
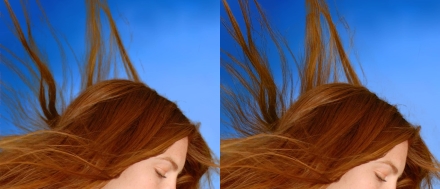
The proprietary chroma key removal algorithm already does an amazing job separating hair from the green background, but with the with a wave of your mouse you can restore even the finest hairs — as pictured on the before and after pictures above.
Other powerful airbrushes will easily help you to adjust green areas of your subject like a bride’s bouquet, fix green screen shadows, blend layers for transparent areas like glass and veils and even make your subjects look years younger with the smoothing brush.
New Special Effects Functions Super-Power Your Post-Production
With the addition of the seven new Special Effects functions, Green Screen Wizard Pro 8.0 takes chroma key software to an entirely new level of performance. Quite simply, there is no other product available that can touch the overall functionality of this software. Just look what you and your designer can do during the post production of your green screen images.
The new Special Effects available with the release of Version 8.0 include:
Add Reflections
This is one fun and powerful feature! Take a look at the image at the beginning of this blog post — we used the Add Reflections special effect to produce it. And despite the incredibly realistic result, it was a snap to create. You have total control too — change the size, angle, transparency and texture of the reflection with simple sliders. You’ll fool even the sharpest eye with this effect. They’ll never believe it’s a chroma key image!
 Lighting Effects
Critical to a successful background removal is the ability to achieve clean edges in your green screen photos. To accomplish this, it’s important that your lighting is even, so you’re not creating shadows on your green backdrop. You can also try using available ambien light as we discuss in Simple Steps to Mastering Green Screen Photography.
So what do you do when your final image requires some additional lighting to create a dramatic effect? The answer is now at your fingertip with the new Lighting Effects.
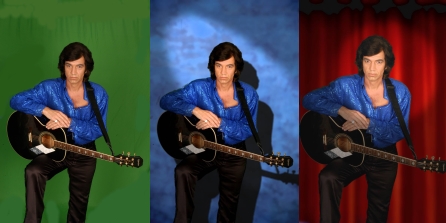
You’ll be able to choose from a number of lighting effect types such as sheet, circle or cone lighting. You can control the amount of start and end light applied and even add a white or black glow around the foreground image. Use the Shadow Generator feature to create a background shadow to enhance the realism as you can see was done in the middle image above.
 Advanced Silhouette
In addition to classic black silhouettes Version 8.0 gives you the ability to change the color of the silhouette and also replace the black in the silhouette with any image. The results can be stunning and very artistic. The Advanced Silhouette special effects is a simple and quick way to produce unique, personalized art for your clients.
Skin Smoothing
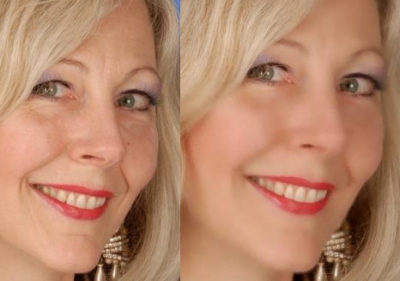 Who doesn’t want to have younger looking skin? Version 9.0 has a proprietary smoothing algorithm built into the Skin Smoothing special effect. With a few strokes of your mouse, watch fine lines and age spots disappear. Your clients will be overjoyed to see themselves looking years younger. Don’t be surprised if they order more reprints or ask you to use the same image with additional backgrounds!
Black & White and Sepia
With this effect you can make your foreground and/or your background Black and White or vintage Sepia. This special effect is becoming very popular these days, especially combining the back and white with a color image. With this software, you can quickly change the images from color to black and white, and back again — so you can easily judge the impact of this special effect.
Framing Options
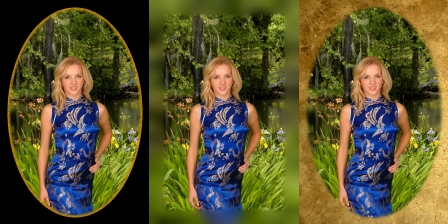 With the release of Green Screen Wizard Pro 9.0, the Framing Options have been simplified, yet made much more powerful.
Now the software can generate four frame types: Square, Oval, Heart, and Jagged. You can pick a color from the palette or even use an image for the frame — or a texture can be added to any frame. There’s even a second frame overlay that lets you create even more variations.
And as shown in the middle image above, one of the more unique features is the Blur Frame that lets you use the background of the image as a source for frame content.
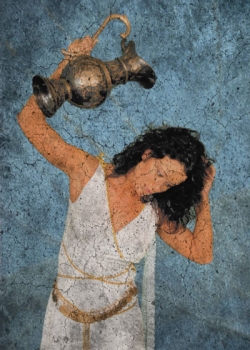 Add Artistic Texture
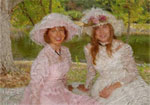
One of the most unique and popular special effects is Artistic Texture. By adding artistic texture to an image, you can change an ordinary photo into a work of art. Rather than posing for a painter for hours and spending hundreds of dollars or more, your clients can come to your studio for a simple photo shoot. Then you can use the latest version of Green Screen Wizard software to create a very flattering artistic/painted effect. The software even allows you to slightly distort the image, resulting in an ‘impressionistic’ look and feel that is sure to get the “Wow!” reaction.
Learn more about Green Screen Wizard Pro Version 9.0 for both Windows and MAC. Currently, photographers who purchase the software also receive 4 Special Effects Background Image Collections FREE — that’s over 260 quality images!